About Me

My photo
Sewing is therapy for me. I hoard fabric, patterns, notions, and spend more time shopping for fabric than I care to admit...

Thursday, May 30, 2013

Vogue 1170 Rachel Comey top

Pattern Description:
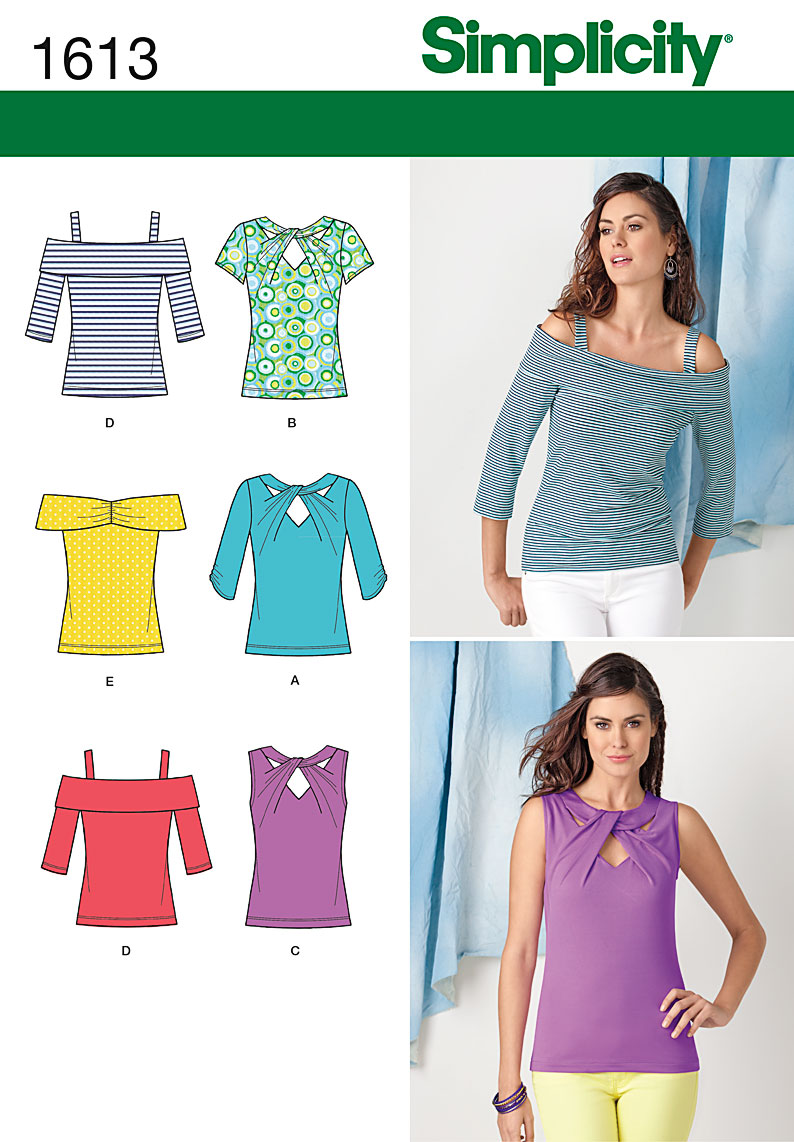
This is a Rachel Comey top and skirt pattern.  The top is very-loose fitting with front keyhole opening with knot, back yoke, back band, extended sleeves tied into knot and back button closing. 
I haven't tried the skirt yet, but it's super cute, so that may be next....


Pattern Sizing:
There are two sizing options AAX (4 to 10 or DD 12 to 18.  Since this top is very-loose fitting, I made a size smaller than I usually do for Vogue and ended up with a 12. 

Did it look like the photo/drawing on the pattern envelope once you were done sewing with it?
Yes, my top looks like the drawings.  I just wish I liked it better on me.  It looks cute on the model and everyone I have seen review it. 


Were the instructions easy to follow?
For a Vogue pattern that is rated Average, instructions were easy.  No head scratching whatsoever.  There are a lot of little steps they have you take that really aren't necessary and don't really lead to a higher quality garment, but more on that to follow. 

What did you particularly like or dislike about the pattern?
Like:
I like the styling with the cut on sleeves that tie. 
Button up back. 
Dislike:
All the French seams.  They are okay, but sometimes on a curved seam such as the one running from the armscye to the hem, it is tough to get exactly perfect. 
Here is my other main gripe, with the narrow hems on the sleeve ties you have a spot where the narrow hem meets a seam and I just hate those narrow gaps.  Even though you sew up to the very spot where the hem meets the seam, I still feel like there is something more you can do to give a nicer finish on the inside.
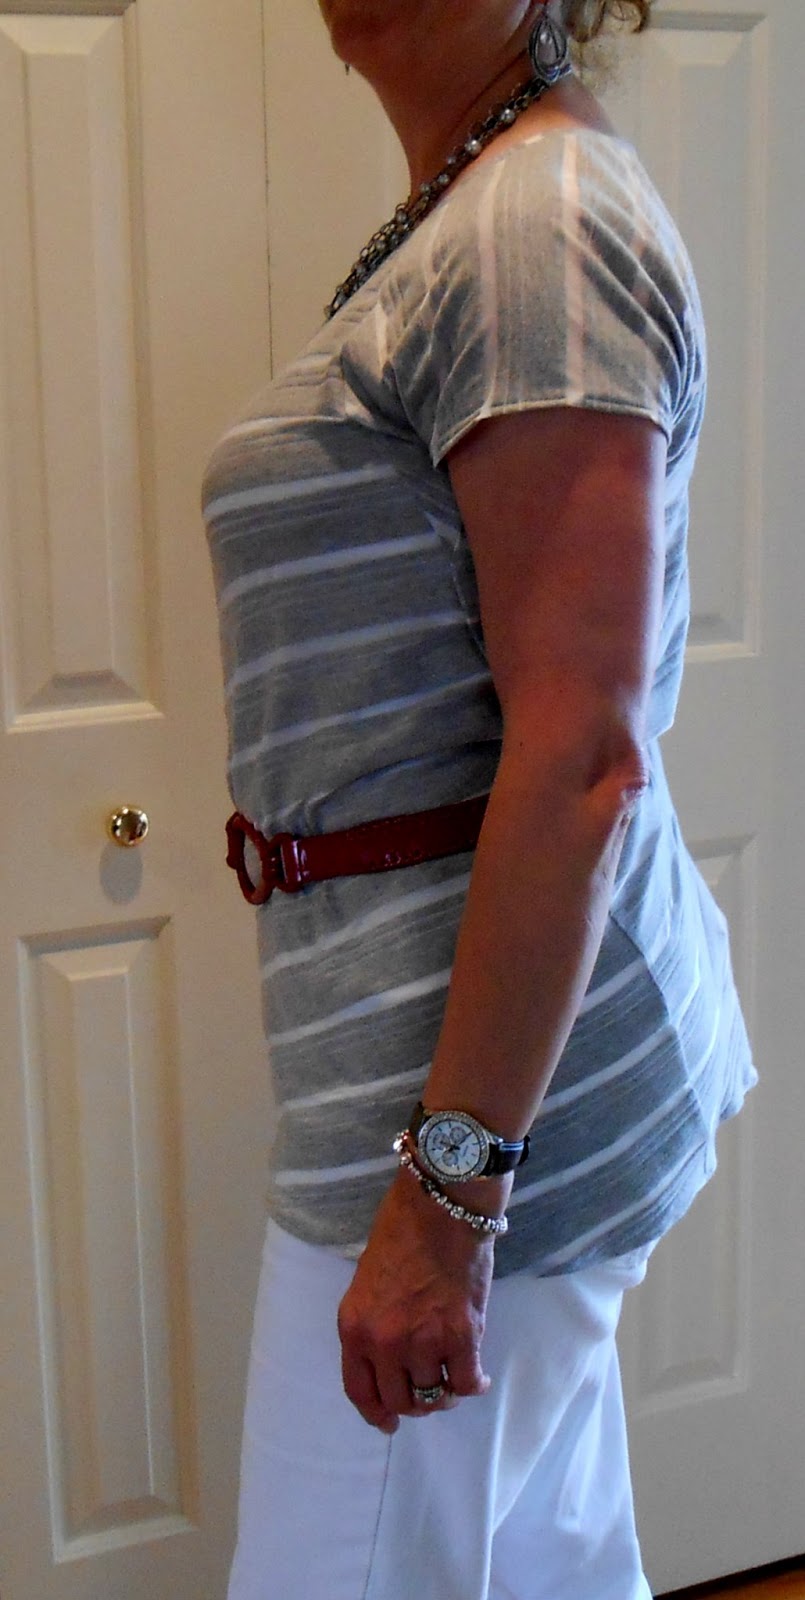
I feel like this top is really boxy.  I wish it was 2 or 3 inches longer.  That is just a personal preference. 
Fabric Used:
This was made from 100% cotton that I batiked myself!  It was great fun and I didn't quite know what to expect, but it is soft and colorful. 

Pattern alterations or any design changes you made:
The one thing I did differently and this was mainly due to other reviewers comments was the hand gathering under the arm.  I mean really?  Here's what I did instead and mind you, I don't know for sure if it was better or not, I machine gathered the area and then cut a bias band and applied it to the underarm area just like the neck facing was applied.  Like I said, not sure if that was better or not but hand gathering didn't seem like a great idea. 
I also made my usual 1/2 inch sway back adjustment making a wedge at the center back and tapering to nothing at the side seams.
I covered my own buttons as well. 

Would you sew it again? Would you recommend it to others?
I really don't think I will sew this again. I feel like I am being strangled with the knot and need to work on the placement of it.  I just don't like how the overall garment looks on the inside to make another one.  Do I recommend it?  Not really.  The skirt however is really cute and I really want to give it a go. 

Conclusion:
Really, this is just an okay top.  Maybe lowering the front neck at least an inch and leaving out all the French seams will help but I am not going to rush to create it again. 

Thanks for reading!
Sue

Monday, May 27, 2013

Simplicity 1613

Pattern Description:
Here's what the back of the envelope says: Misses' knit tops.  That's it!  Here's my version: Misses' close-fitting tops in two different styles and three sleeve lengths.  A, B, C has front cross-over detail and D & E have off-shoulder sleeves (That's how I describe it anyway!)
   
Pattern Sizing:
I purchased the envelope with sizes 12 to 20 in one package.  Since this pattern is pretty close fitting and the tops have a lot of shaping on the pattern pieces, I made a size 16 figuring I could take it in much easier than letting it out.  I think it fits just how I would want: not too loose nor too tight.  To give you a comparison, with Vogue I typically sew a size 14 as there is a lot of ease.  I not quite a familiar with Simplicity but after seeing this adorable pattern, I will be checking this pattern company out more! 

Did it look like the photo/drawing on the pattern envelope once you were done sewing with it?
Yes, I believe it looks a lot like view D, which is the one I made.  I am so glad there is an actual photo on this pattern envelope! 
  
Were the instructions easy to follow?
Instructions seemed to be great.  I glanced at them and then pulled them back out when I sewed the shoulder band on incorrectly.  After that little mishap, I read that step and realized I really need to quit watching HGTV while I sew.  I get distracted at times.  :)   
   
What did you particularly like or dislike about the pattern?
Likes:

Love, love, love the shaping of the top.  There aren't too many t-shirts with waist definition.  This one has quite a bit. 
I really do love the shoulder band.  The way this top is constructed, the seams are on the underside of the band so you don't see anything other than a clean finish on the band. 
The length of the top is great, not too short, not annoyingly long. 
Did I mention the details?  Views A to C are ADORABLE!  I also love D. 
Sleeve length is really great as well.  Not too long or short.   
Dislikes:
I really can't think of anything I didn't like. 

Fabric Used:
I used this super bright floral from gorgeous fabric.  It has been so dreary lately, I decided I needed some color and wow did this work!  If I remember correctly this is a poly knit with some but not too much Lycra.  It sewed beautifully! 

Pattern alterations or any design changes you made:
I only made one change to the instructions and that was to use 3/8" elastic rather than 1/4".  I used the elastic guide included in the pattern and decided I would have some major wardrobe malfunctions if I kept the piece that large in the top.  I experimented until I got a comfortable amount around the shoulders: Too tight and every time you move the band pops up to your earlobes.  Too little and you will be hiking this up all the time. 
I also shortened the straps about 1/2" so they didn't fall off my shoulders constantly. 
I made my usual 1/2" swayback adjustment. 
 
Would you sew it again? Would you recommend it to others?
 Oh yes, I can't wait to make the other tops.  The directions look easy to follow and the styling it so stinkin' cute! 
This is a fairly easy pattern.  If you have sewn with knits, you'll do fine with this pattern. 

Conclusion:
I love my new top with these light yellow jeans I found in my closet.  It is super comfortable and stayed put today when I wore it to a barbecue.  DH thinks it is pretty sexy for a 50 year old grandma to be! 

Thanks for reading!


Sue

Saturday, May 25, 2013

Butterick 5646

Pattern Description:
This pattern is for four different tunics that are semi-fitted and have double bands.  A, B, C have stitched armhole facings.  C, D have stitched pleats. 

Pattern Sizing:
Sizes are Y (XS to M) and ZZ (L to XXL).  I made a medium in view B and it fits just fine. 

Did it look like the photo/drawing on the pattern envelope once you were done sewing with it?
Yes, I believe my finished garment looks quite a bit like the envelope.  I really detest some of the line drawings they do nothing for people wanting to pick it up and sew it.  I found it mainly by checking out McCallspatterns.com.  The photograph does this top justice. 


The envelope just has the drawings.  The photograph is on the website.   

Were the instructions easy to follow?
Instructions were more than adequate.  I merely glanced at them and then did my own thing with the band and buttons. 

What did you particularly like or dislike about the pattern?
Likes:
I really like the style of this top along with the length.  It is a tunic with some funky twists of the pleated side or sides and the pockets.  Sleeves are totally optional and while I included them, I am not sure I love them.  I may take them off, but we will see. 
Everything is well drafted and fits together really well.  I started with the no sleeves option which required the armhole facings which is awful with white fabric.  So, after I decided to attach the sleeves and left the facings.  I cut them down to about 1/2" so it looks more like RTW. 
Everything is nice a tidy on the inside, especially the way the top is hemmed and then the bands are attached. 
Dislikes:
I really didn't like the band for the buttonholes and buttons.  It is a single layer of fabric that is not interfaced or anything.  In this step the directions tell you to back the buttonhole with a remnant of fabric to reinforce the area.  Well, with cotton fabric, I thought it wouldn't hold up, so I went ahead and cut another piece of band, interfaced it, and attached it to the other band so it is two thicknesses instead of one.  Hopefully you can see what I did in the photograph. 
I also think I may take in the center back seam at the waistline to give it a little more definition on the backside.  What do you think?  Should I alter it?  DH thinks it is fine.  I am open to suggestions.  :) 

Fabric Used:
I used this colorful white/orange stretch cotton from fabricmart.  I think I bought it last summer and I am such a sucker for orange and white that I had to have it.  It sewed up really well, presses well, and just behaved beautifully during the entire process. 

Pattern alterations or any design changes you made:
The only design change is listed above in the dislikes.  I also made my usual 1/2" swayback adjustment. 

Would you sew it again? Would you recommend it to others?
Yes, I would like to make this again in a silky- type fabric.  I believe the flow would be amazing and the way it would skim your body would be just lovely.  I do recommend this pattern to others.  It went together in about 3 hours from cutting out to sewing on the buttons. 

Conclusion:
Don't let a dull pattern envelope fool you, this is a cute, under-reviewed top that has great potential!

Thanks for reading!
Sue

Update:
I decided to take in the back side so it fit more smoothly and gave some definition to my waist area. 
Here's what I did:
1.  Made two ~12" darts from the bottom of the shoulder blades to the hips.  At the widest point, the darts are 1/2" deep. 
2.  Took the side seams in at the waist 1/2" on each side. 


Overall, I am much happier with the result.  I do believe that next time I make this top I will take a about 3/4" wedge out for the swayback adjustment rather than my usual 1/2". 
I think the front and side lays better now that it has been taken in.  What do you think?

Thanks for the helpful comments!
:) 


Tuesday, May 21, 2013

Butterick 5510 for Babies!

<b>Pattern Description: </b>
This is an uber cute baby boy pattern that I made for my Grandson, whom will be born in September.  I simply couldn't resist, could you? 
Here is the description from the back of the envelope: Loose-fitting shirts, A, B have collar, dropped shoulders, stitched hems and above elbow sleeves.  Loose-fitting T-shirt has neck band and short sleeves.  Pants C have stitched detail, front waistband, carriers, back hems and snap inner leg.  Pants D have no ides seams, elastic waist and ankles.  Purchased trim.  Hat has crown and brim. 


<b>Pattern Sizing:</b>
Size combinations are NB to M or L to XL.  I made a medium or about a six month old size (at least I think that's the size.) 

<b>Did it look like the photo/drawing on the pattern envelope once you were done sewing with it?</b>
Yes, I think mine looks quite a bit like the photo of the very cute little guy on the envelope. 

<b>Were the instructions easy to follow?</b>
Instructions were great.  The written and visuals made perfect sense. 

<b>What did you particularly like or dislike about the pattern?</b>
This pattern is super easy and stylish.  The pants turned out to look like little jeans and that was the look I was going for.  One thing I didn't like was how the neckline was finished.  I did my own thing and serged the edge rather than turning under and slip stitched.  It just seemed like the collar wouldn't lay very well and also, I was feeling a tad bit lazy.  I am not sure if it was due to a pattern drafting error or an error on my part, but I had to make tiny tucks on the front pant leg so the waistband would fit.  I need to sew this again and not watch Grey's Anatomy so I can determine whether it is operator error or not. 

<b>Fabric Used:</b>
100% cotton for both the shirt and jeans.  The denim was a remnant from a previous project and the Star Wars fabric I purchased because my son-in-law and daddy-to-be is a huge Star Wars fan. 

<b>Pattern alterations or any design changes you made:</b>
Other than the neckline finish I added some embroidery to the back pocket.  I couldn't resist putting 'Jedi in training'.  It's cute, at least I think!  I also didn't want to add the snap tape to the legs as I haven't found one that feels like it will hold up to multiple washings.  If anyone has some ideas on sources, please let me know as I see a lot of baby garments in my future. 

<b>Would you sew it again? Would you recommend it to others?</b>
Yes, I will be sewing this cute little pattern many times and I highly recommend it to others.  It's cute, easy, and I just giggled the entire time I was making it.  What fun! 

<b>Conclusion: </b>
I decided to submit this into the natural fibers contest.  Enjoy making this pattern for the little man in your life. 
Thanks for reading!
Sue
Can't wait until I have a live model to wear the creations I make for him!

Sunday, May 19, 2013

Vogue Easy pants 8883

<b>Pattern Description: </b>
This is an easy pants pattern described like this: Semi-fitted shorts or tapered pants have self-lined yokes, side front and back seams and back zipper.  C: Narrow hems.  D: Tie Ends and cuffs.  C, D: Side slits with purchased trim.  A, B, E: Stitched hems. 
V8883
<b>Pattern Sizing:</b>
A5 (8 to 14) or E5 (14 to 22)
I made a size 14 with just a few adjustments based on my muslin. 


right side is the muslin, left fitted for me


<b>Did it look like the photo/drawing on the pattern envelope once you were done sewing with it?</b> Sure did! 

<b>Were the instructions easy to follow?</b>
The instructions are more than adequate.  Honestly, this is one of those patterns that you can look at the line drawing and figure out how to create it, it is that easy! 

<b>What did you particularly like or dislike about the pattern?</b>
Caboose side
I thought the ease wasn't as typical as is in most Vogue patterns, especially those listed as semi-fitted.  According to the finished measurements on the tissue and my experience with Vogue, it fits quite a bit snugger in the waist and hips than I am accustomed to.  Also, I had to adjust the rise in order to accommodate me.  Other than that, I really do like the style of the pattern.  My only real gripe is a zipper on the booty.  I moved it to the side.  Read on for more information about the minor alterations I made.

<b>Fabric Used:</b>  
Denim from my stash.  My muslin or the view on the right was made with a much lighter weight denim than the version on the left.  I love the weight of the muslin and encourage anyone wanting to make these pants to use a light-weight fabric as it will lay nicer. 

<b>Pattern alterations or any design changes you made:</b>
1.  For my muslin, I made a straight size 14 and felt the rise on the crotch seam was a little short.  I added 1/2" on the front and back at the waistline for a much more comfortable fit. 
2.  For my muslin and finished pant I moved the zipper from the center back seam and moved it to the side.  I think it looks better and definitely feels better.  I eliminated the side ties from the final garment due to a lack of fabric.  Both pieces were from my stash so I had limited yardage.
3.  To finish off the waistband on the inside of the garment, I attached some bias tape from my stash, stitched it down and rather than turning the edge and stitching, just pinned it flat and stitching in the ditch.  It is much less bulky and let me use up some scraps and add some color to the waistband.  When I look at higher-end RTW pants, I often see this type of application at the waistband.   The creases you see on the inside of the waistband are just that, creases.  I am sure after I wash the denim again, they will come out. Luckily, they are not visible from the right side.  :) 

<b>Would you sew it again? Would you recommend it to others?</b>
I do plan on creating these pants again soon in a linen or linen-like or a dressier than denim type fabric.  The denim is great, but for warm summer days, a nice light weight fabric will be welcomed. 
I do recommend this pattern to others, especially beginners or those that have never tackled pants.  It is an easy pattern to get your feet wet on, if you know what I mean!

<b>Conclusion: </b>
Sorry I am not modeling these for you.  It is one of those days where I feel like I ate a pound of raw bread dough that expanded in my stomach and I can't even think about putting on anything that may actually have a waist! 

Thanks for reading!
Sue

Monday, May 13, 2013

Vogue 8792 The super easy Tunic/Tee

Hello summer!  We finally have summer-like weather in the northern plains and wow does it feel great!  What a welcome pattern this will be! 

Here's the description:
Misses' top: pullover top has neck band and seam detail.  A, B, C: Bias, loose-fitting, front extends to upper back, back extends to upper front, no shoulder or side seams and stitched hem.  D, E, F: Close-fitting, bias lower front and lower back, raw edge finish and stitched hem on sleeves.  Front and back cut on crosswise grain of fabric. 

V8792

  Cute, huh? 
Sizing is A5 or 8 to 14 or E5 14 to 22
I made a size 14 and view B.

This pattern is sized for moderate stretch knits only so make sure you test your fabric on the gauge shown on the back. 

There are only eleven steps to this top, so it whips up quick with great results.  Written and visual instructions are great.  I think my top looks a lot like the envelope.   

I used a knit I purchased from Marcy Tilton.  It is rather light and somewhat sheer, so I wore a white tank underneath. 


Likes/Dislikes:
I really like the length of this tunic.  It would be just about perfect if you wore leggings with it. 
On thing I will change for next time is to widen the sleeve opening.  It is slightly snug and I by no means have big arms!  There isn't really a way that I can figure out how to check that measurement based on the pattern pieces.  Once you lay it out, you will see what I am talking about. 
I am really on the fence about views D to F.  I just hate darts in T's.  If I have a busy fabric, I may try it, but with a solid?  Not sure I will even consider it. 

Make this super easy pattern a part of your wardrobe.  You'll love it!

Thanks for reading!
Sue
 

Wednesday, May 8, 2013

Kwik Sew Tunic Repeat! 3463

So here is round two of one of my favorite tunics!  I just love this under reviewed pattern.  It is so very simple, fits great, goes together well, what more could you want?

Just as a reminder, here is the pattern envelope. 


For this version, I obviously made the view with short sleeves and the lower neckline. 
Since this was round two, I won't bore you with too many details. 

I used a sheer knit from Marcy Tilton.

I love this fabric! 
I wore a black cami underneath the tunic.  It was easy to sew and I did use pins as the cut edge tended to roll. 

 
From the back of the website: McCall Pattern Company:
These tunics are designed for lightweight stretch knits only with 20% stretch across the grain. We suggest single knit, jersey, and interlock fabrics.

These leggings are designed for two-way stretch fabrics with 75% stretch across the grain. We suggest cotton Lycra®, rayon Lycra®, nylon Lycra®, and swimwear fabrics.

Tunic view A has full-length sleeves and a round neckline with self-fabric neckband. Tunic view B has short sleeves with cuffs and a scoop neckline with self-fabric neckband. Tunics are shown with purchased belts. Leggings, without side seams, have an elastic waist. View A are scrunched at the ankle, View B are ankle length, and View C are below-knee length.
And, here are the line drawings. 
Line Art

Here is what I changed from the original pattern:
1.  I cut the neckband on the bias.  Believe it or not, I didn't have a piece of fabric large enough to cut on the cross grain, so I improvised.  It worked. 
2.  For heaven sakes, don't set in the sleeves.  Sew them on after you stitch the shoulder seam.  I attached the cuffs prior to attaching the sleeves.  After stitching the sleeves on, I serged from the cuff to hem and then folded the cuff in place and stitched in the ditch to secure it. 
3.  For fabric this sheer, it was a must to use steam-a-seam lite to baste the hemline in place. 
This entire process took about one hour to create from cutting out to stitching the hems.  Use a fun fabric and you won't be disappointed!  I opted to lengthen the top to the large setting and used a medium through the hips and waist and a large in the chest. 

Very comfortable top!  Try it!

Sue